Showing posts with label Tool. Show all posts

Sunday, July 13, 2014

Exploring BDDfy

BDDfy is a BDD library (part of the larger TestStack project). It's function is to turn regular unit tests to BDD style tests (using the Gherkin syntax). You can read more about BDDfy here.

BDDfy can be used with any test framework or runner.

Acquiring

To add BDDfy to your test project via NuGet run this command in the Package Manage Console.

Install-Package TestStack.BDDfy

Optionally, you can also install code samples with this package.

Install-Package TestStack.BDDfy.Samples

Exploring


Hello world

For this part I'll be using the xUnit test framework. Let's start with something simple.

public class FirstTest
{
    void GivenTwoAndTwo()
    {
        // ...
    }

    void WhenIAddThem()
    {
        // ...
    }

    void ThenTheAnwserShouldBe4()
    {
        // ...
    }

    [Fact]
    public void ExecuteFirstTest()
    {
        this.BDDfy();
    }
}

All the magic is done by the BDDFy extension methods. This will scan the FirstTest class for methods starting with keywords like Given, When and Then. Next, it will run the methods in order (BDD style). Finally, we will get a nice output report like this.

Test output in Visual Studio

BDDfy will also generate a BDDfy.html file in the test project output folder. This is the report of all BDDFyed tests.

HTML tests report

Using attributes to customize the test

BDDfy follow conventions when scanning a class for methods of interest, you can find a list here. If we need more control we can do it by using attributes.

[Story(
    AsA = "As someone lazy",
    IWant = "I want the computer to add 2 number",
    SoThat = "I don't have to do the math myself")]
public class TestWithAttributesToOverriteText
{
    [Given("Given 2 + 2")]
    void GivenTwoAndTwo()
    {
        // ...
    }

    [When(" + ")]
    void WhenIAddThem()
    {
        // ...
    }

    [Then("Then the anwser = 4")]
    void ThenTheAnwserShouldBe4()
    {
        // ...
    }

    void AndThenItShouldDisplayTheAnwser()
    {
    }

    [Fact]
    public void ExecuteTestWithAttributes()
    {
        this.BDDfy();
    }
}

First, the [Story] attribute allow us to provide the classic story definition for the test. Other attributes like [Given], [When] and [Then] allow us to provide a custom description for the steps. Also, using the attributes will allow us to name the step methods the way we want.

Creating more than one scenario per story

Usually a story contains more than one test or scenario. We can do this using nested classes.

[Story(
    Title = "Using story attribute and setting the Title!",
    AsA = "As someone learning BDDfy",
    IWant = "I want to try splitting scenario in separated classes",
    SoThat = "My code is cleaner")]
public class TestWithStoryAndScenarioInSeparatedClasses
{
    [Fact]
    public void FirstScenario()
    {
        new S1().BDDfy("Custom scenario title");
    }

    [Fact]
    public void SecondScenario()
    {
        new S2().BDDfy();
    }

    private class S1
    {
        void GivenWhatever() { // ... }
        void WhenSomethingHappens() { // ... }
        void ThenProfit() { // ... }
    }
    private class S2
    {
        void GivenWhatever() { // ... }
        void WhenSomethingElseHappens() { // ... }
        void ThenProfit() { // ... }
    }
}

This will group scenarios together in the output report.

Using the fluent API for even more control

With what we've seen previously we need to create a new test class for each scenario we have. That leads to a lot of duplicated code unless we delegate to a common test fixture. An alternative is to use BDDfy fluent API to get some code reuse between our scenarios.

public class TestWithFluentApi
{
    [Fact]
    public void ReusingStepForScenario1()
    {
        new TestWithFluentApi()
            .Given(s => s.GivenWhatever(), "Given some pre-condition")
                .And(s => s.AndOtherGiven(54))
            .When(s => s.WhenSomethingElseHappens())
            .Then(s => s.ThenProfit())
                .And(s => s.AndManyMore(45))
            .BDDfy();
    }

    [Fact]
    public void ReusingStepForScenario2()
    {
        new TestWithFluentApi()
            .Given(s => s.GivenWhatever(), "Given some pre-condition")
                .And(s => s.AndOtherGiven(123))
            .When(s => s.WhenSomethingElseHappens())
            .Then(s => s.ThenProfit())
                .And(s => s.AndManyMore(321), "And {0} more things!")
            .BDDfy("Scenario 2 with steps re-use");
    }

    void GivenWhatever() { // ... }
    void AndOtherGiven(int input) { // ... }
    void WhenSomethingElseHappens() { // ... }
    void ThenProfit() { // ... }
    void AndManyMore(int expected) { // ... }
}

With this style of test, not only we can reuse steps between scenarios we also gain the ability to parameterize the steps.

Assessment

I've only scratched the surface of what BDDfy can do. You can read more about on BDDfy usage and customization on the project web site.

In the past I've use SpecFlow for my BDD tests. With SpecFlow you write your specification in a text file using the Gherkin language. The tool then parse the file and execute corresponding method for each steps. Having a text file seems interesting because we could have a business analyst write those. In really, developers ends up writing the stories and scenarios anyway.

This is why I like BDDfy, it's easy to learn and gives developers a lot of control over the way we create BDD style tests.

One more for my toolbox!

I hope you enjoyed this introduction to BDDfy.

Saturday, May 24, 2014

Managing NuGet packages dependencies with the Package Visualizer tool

If you ever used NuGet on a large enough solution you know you can get into trouble when projects reference different versions of the same NuGet package. That happens a lot in Azure projects as the libraries/packages get updated all the time.

I'm really surprise when I talk to people using NuGet everyday that they don't know about the Package Visualizer tool. (update: I've been told that this feature requires VS Ultimate and is not available in the Pro version. I'm still going to show it to you but stay tune for another post with a free alternative later)

NuGet Package Visualizer in Visual Studio


Once you open up a solution in Visual Studio you can go to the Tools menu, NuGet Package Manager and Package Visualizer.


This will analyse all the packages.config files in the solution and generate a DGML diagram of all NuGet packages and projects of the solution.  The diagram will help us see packages usage in the solution and find the ones with different versions.  Below you can see that I've tried this on the Roslyn (open source C# compiler) solution.


The first thing to note (and a surprise to me!) is that Roslyn use the XUnit testing framework and not MsUnit! More seriously we can quickly see that we have no duplicate packages with different versions. If we compare that to this sample solution I created we can see I'm using two versions of the Json.NET library. Now I know I should update the ClassLibrary1 project to use the new version of the package.


Of course, this only work for NuGet packages but it would be useful to have something like this for regular DLL references.  I'll try to work on a LinqPad query to generate such a DGML graph with all projects, libraries and packages.  Stay tune till next time.

Friday, April 25, 2014

Looking inside a NuGet package with NuGet Package Explorer

When I really want to learn something new (like a new tool, technology or a programming language) I do two things

  • I try it myself
  • Check out what others have done

I'm currently learning how to create my own NuGet packages so I'm trying to do a lot of things on my own, but I would also like to see how existing packages are made.

After installing a NuGet package in your project you can go in the packages folder and unzip the .nupkg file (yes, it's only a zip file with a different extension).  Fortunately, there is an easier. NuGet Package Explorer is an open source tool available on CodePlex.

With it you can load a package from the official NuGet feed or any other feeds you want even local feeds.


Then when we open a package we can explore its content and even go inside individual files


NuGet Package Explorer also allow us to edit files and the package itself if we want.

One trick I like to do is to add my local NuGet package download cache as a feed. To do that in the Tools menu select View NuGet download cache.


This is the folder where all the packages you previously downloaded are cached (from Visual Studio, NuGet Package Explorer and any other NuGet based tools). Simply copy the path and paste it in the Package Source field like this


This way I can quickly get to a package I just installed in my solution.

NuGet Package Explorer is a powerful tool I use a lot to understand how NuGet packages are made.

I hope it will help you too.

Friday, April 18, 2014

Packaging and distributing tools using NuGet

NuGet is an amazing tool to manage dependencies for external libraries. As part of Visual Studio it gives us an easy way to install and update those libraries over time. Now even Microsoft use it extensively to release updates to us. But the power of NuGet doesn't stop here. Some people found imaginative ways to use NuGet like the ScriptCs project and Chocolatey.

Another usage is to package and distribute utilities via NuGet packages like FAKE and xUnit.Runners. To create your own tool package you need to author a NuSpec file like this:

<package>
  …

  <files>
    <file src="tooling\app.exe" target="tools\" />
  </files>
</package>

The key here is to set all your file's target to tools\. Doing that the package will be considered a solution-level NuGet package and will be available solution wide instead of only for one project.

For example if I install the xUnit.Runners package to my solution like this:

PM> Install-Package xunit.runners

You will see that only a new package.config file will be created in the .nuget folder at the root of your solution. This is where all solution-level packages will be referenced. Nothing will actually change inside your projects.

After that all the files required to run the xUnit runner from the command line, PowerShell or a build script will be available from the \packages\xunit.runners.1.9.2\tools folder.

The power of NuGet doesn't stop there but we'll check that in another blog post.

Sunday, February 3, 2013

Using MiniProfiler for Entity Framework

The most important thing to know when using an ORM for your database querying is what exactly happens behind the scene. Do you know if what you are doing will produce acceptable SQL? Do you know if the query will execute fast? Worst of all, do you know how many queries will be executed?

To help answer those questions we need to profile our ORM. Good tools like SQL Profiler, Entity Framework Profiler and NHibernate Profiler exists but you need to spend money for them.

On the free side of things, MiniProfiler is a library we can add to our project via a NuGet package for Entity Framework in this case. MiniProfiler was created for ASP.Net MVC applications in mind but we can still use it in a desktop application using another library called MiniProfiler.Window.

Here is a small example on how to use both libraries together:


This will output to the console the duration of the execution, the raw SQL and parameters of the query. Of course we'll want to refactor this code a bit but it gives you an idea on how MiniProfiler works.

Just a small warning, for reasons unknown to me mixing MiniProfiler and Entity Framework's database initialization like DropCreateDatabaseAlways is not working. As long as we are disabling the initialization with Database.SetInitializer<Context>(null) everything's working just fine.

Thursday, November 1, 2012

Querying TFS using Roslyn

Roslyn is an ambitious new project by Microsoft. It is the fully written in .Net replacement of the old compilers used in Visual Studio and should be shipped in a future version of the IDE. The current compilers csc.exe and vbc.exe were first shipped in version 1.0 of .Net more than 10 years ago.

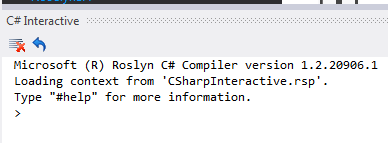
Roslyn offers a lot of new possibilities. As of today Roslyn in still is in CTP and the latest release was in September 2012. For this first post on Roslyn I want to explore the new C# Interactive window (you will need to download and install the CTP for that).

For this demonstration I'll use one of my previous query for LinqPad, Searching in all work items.

First we need to open the C# Interactive window (from menu VIEW -> Other Windows -> C# Interactive)


Then we start by referencing the required libraries using the special #r instruction
> #r "Microsoft.TeamFoundation.Client"
> #r "Microsoft.TeamFoundation.Common"
> #r "Microsoft.TeamFoundation.VersionControl.Client"
> #r "Microsoft.TeamFoundation.WorkItemTracking.Client"

Next we need to import the namespaces we are going to use with the using statement like this
using Microsoft.TeamFoundation.Client;
using Microsoft.TeamFoundation.WorkItemTracking.Client;

Now we are ready to write some real code. I'll be using my online Team Foundation Service account for this. You can register for a free account here.
> var uri = new Uri("https://my.visualstudio.com/DefaultCollection/");

> var tfs = TfsTeamProjectCollectionFactory
    .GetTeamProjectCollection(uri);

> tfs.EnsureAuthenticated();

> var workItemStore = tfs.GetService<WorkItemStore>();

> var title = "phone";

> var query = string.Format(@"
    Select [Id], [Work Item Type], [Title], [State]
    Where [Title] Contains '{0}'
    From WorkItems",
    title);

> var results = workItemStore.Query(query).Cast<WorkItem>()
    .Select(wi => new
    {
        wi.Id,
        wi.AreaPath,
        Type = wi.Type.Name,
        wi.Title,
        wi.State
    })
    .OrderBy(wi => wi.AreaPath).ThenBy(wi => wi.Type).ThenBy(wi => wi.Title);

Of course we don't have access to LinqPad's Dump function so we have to print the results ourself.
> foreach (var r in results)
{
    Console.WriteLine("{0} - {1} [{2}] {3} <{4}>", 
        r.Id, r.AreaPath, r.Type, r.Title, r.State);
}
2 - Project1 [Bug] Bug #1 - Fix the phone number on the Contact page <New>

I think using LinqPad is still easier for this kind of work but those who don't have a paid version of LinqPad will like the facts that Roslyn is free, offers a way to write queries using Intellisense and also a more interactive way to work and find the data you are looking for.

Sunday, October 7, 2012

How to reference and reuse LinqPad queries

One missing feature from LinqPad is the ability to easily reuse code in a query we wrote in other queries.

If we really want to do it we have the following options:
  • Copy and paste the code into the new query
  • Open Visual Studio, create a project, create a class and copy the code you want to reuse. Compile the project and finally reference the generated dll from your query.
  • Compile the LinqPad query directly (using a special script), then reference the generated dll from your query.

Today we will look at the third option. Found in the .Net framework is a very interesting API called the CodeDOM API. This API can be used to compile .Net code at run-time, like the compiler does. With this, we will be able to parse a LinqPad query and compile it.

This is what we will look into right now.

Compiling a LinqPad query


Those are the steps we need to do to accomplish query compilation:
  1. Read the query and extract the options, usings and references
  2. Create the CodeDOM objects and set the options and references
  3. Create a string of the code file including the usings and wrap the query code inside a class
  4. Compile the code

I'll explain in details each steps in future blog posts but for now I'll give you my query to compile LinqPad queries. You will notice that this is a self compiling query as the query compile itself to a dll I can reuse it to compile other queries!


You can figure out the Compiler class usage from the Main function for now.

Additional Namespace Imports

System.CodeDom.Compiler
System.Runtime.InteropServices
Microsoft.CSharp

Query (C# Program)


Tuesday, September 18, 2012

Using NuGet with LinqPad for free

Recently LinqPad got a great integration with NuGet in the paid version of the software

Unfortunately for the user of the free version it is a bit more difficult to use NuGet but it's not impossible.

Today I'm going to show you a way to use NuGet to get libraries into your LinqPad queries.

NuGet Package Explorer


You can download the NuGet Package Explorer from CodePlex

The primary use for this tool is to explorer, edit and publish NuGet packages. You could also use this tool to extract the files contained in the packages and put them in a folder, and that's what we'll do now.

First we need to Open a package from online feed


Here we could query for the package we want.


Select a package and click OK. We can now take a peek inside the package if we want. For us, we want to Export the content from the File menu.


You need choose a folder where to export the files of the package. Finally, in LinqPad we need to add a reference to the DLL by going in the Query Properties (F4) and clicking Browse. After that we are ready to start writing our queries.

Using the NuGet local cache folder


One another tip I've got for you is to add the local NuGet cache folder to the list of online feed as a shortcut for when we want to access a package we previously downloaded with the NuGet Package Explorer or even Visual Studio.

First, from the Tools menu select View NuGet download cache.


This will open a Windows Explorer on the folder %AppData%\Local\NuGet\Cache.


Now copy this path, go back to NuGet Package Explorer and Open a package from online feed. Then paste the path into Package source field and click Reload.


From now on you will be able to choose between the official NuGet.org feed and your local cache when you want to open NuGet packages.

NuGet.exe


Of course for the hardcore user of the command line interface one could use nuget.exe directly to download and extract the files rather than using the Package Explorer. I'm definitely not that hardcore. :-)

NuGet.exe is also available from the CodePlex site.

Friday, August 31, 2012

Using log4net MemoryAppender for unit testing

Sometimes unit testing existing code can be really hard. Especially when coding by exceptions (using Try.. Catch.. then do nothing!).

This will look a bit like this


From the outside we might not be able to test whether ReallyDoSomething has thrown an exception except if we can validate state changes done by ReallyDoSomething. And if we can't change the code much (like adding dependencies using parameters or change the return type of the method) we won't be able to write that test at all.

Another way is to use the logger to validate that.

The piece of code above use Log4Net as the logging framework and allow us to use it in our unit tests like this


Just like that we can intercept all the logged messages by our production code.

I've used this trick a few times now when other options were not available. Hope it helps.

Wednesday, June 20, 2012

NuGet integration in LinqPad

NuGet is amazing in Visual Studio. With it I can easily download and add references to popular libraries in my project with only a few clicks in Manage NuGet Packages or keystrokes when using the Package Manager Console. I really like that because I can try out new libraries without too much effort. I also like LinqPad to try out snippets of code. But if I want to try a library I have to download the binaries from a web site, unzip them on my disk and finally add references to the assemblies from my query before I can start to play around with it.

The new version of LinqPad (v4.42.04 currently still in beta) finally gets an integration with NuGet directly in the tool but only with the Premium Edition. Let's take a look at how it works.

In the Query Properties (F4) we have a new option: Add NuGet...


This will open the NuGet Manager window


On the left we can see all the NuGet packages we already downloaded. Those will be stored in our local AppData folder and be available for all queries. In the middle section we have the NuGet feed search where we can browse for packages to download. Finally in the section on the right we see all the information on the currently selected package.

To add a package to the current query simply click Add To Query. If the package was not already downloaded LinqPad will do it now and after that it will appear in the left section. Finally we can select namespaces to use in the query by clicking Add namespace.

LinqPad will also automatically check for updates for us so we just have to click Update next to the package. All the queries using this package will get updated to the latest version too.

We are not limited to the official NuGet feed but we could also add new feeds to connect to, even our own if we wish. We can add new feeds by clicking the Settings button in the lower left of the window.


Here we can add a remote feed or a local folder if we wish. After that we'll have the option to choose which feed to use in the main NuGet Manager window using the list down the middle section.

Going back to the Query Properties window all the packages we added will be shown as a reference with the location set to NuGet. If we click on NuGet we can see the current version of the package and an option to Show assemblies in this package.


Here we can exclude some assemblies from the package if we need to.

One additional FREE new feature this time we get in this version is the ability to browse for namespaces to add from existing references. In the Additional Namespace Imports tab click on Pick from assemblies


We can now select one assembly to see the list of available namespaces from it. Then simply select the namespaces we want and click Add Selected Namespaces.

Summary

I know that not everyone have the Premium version of LinqPad but still I wanted to show you what appends when 2 amazing productivity tools collide! I guess it is possible to use some NuGet Powershell cmdlet to do part of the job. It think a stand alone NuGet client could be a good idea for someone to come up with too.

Anyway, hope you get the chance to play with those two together

Wednesday, May 2, 2012

Setup your first TFS LinqPad query


Prerequisites

  • LinqPad (of course)
  • Team Explorer (as part of your complete VS2010 installation)

Setup

  • Inside LinqPad create a new empty query and in the Language combo box select C# Statements.

    image
    • Go to the Query Properties page by the Query menu or by pressing F4.
    • You can add assembly references using two ways in the Additional References tab, by browsing or adding them from the GAC

      image

      Adding assembly reference by browsing
      • Press the Browse button
      • The assemblies we want are under C:\Program Files (x86)\Microsoft Visual Studio 10.0\Common7\IDE\ReferenceAssemblies\v2.

        image

        Adding assembly references by adding from the GAC
        • Press the Add button
          • Check the Show GAC assemblies option
          • Enter TeamFoundation in the textbox

        image

        Usually we need at least:
        • Microsoft.TeamFoundation.Client.dll
        • Microsoft.TeamFoundation.Common.dll
        But we might also want:
        • Microsoft.TeamFoundation.VersionControl.Client.dll
        • Microsoft.TeamFoundation.Build.Client.dll

          image

          Now, in the Additional Namespace Imports add the following lines
          • Microsoft.TeamFoundation.Client
          • Microsoft.TeamFoundation.Framework.Client
          And maybe those too
          • Microsoft.TeamFoundation.VersionControl.Client
          • Microsoft.TeamFoundation.Build.Client
          Finally press Ok
          We are now ready to write our first query

          A first query

          Let’s start with something simple
          var tfs = TfsTeamProjectCollectionFactory
              .GetTeamProjectCollection(new Uri("http://localhost:8088/tfs"));
          
          tfs.Dump();
          

          Now press F5 and you should get a result like below

          image

          That’s it.  You are now ready to start writing useful LinqPad queries against your TFS server.

          What's next


          You should take a look at useful queries I wrote using LinqPad and the TFS API here.

          Thursday, January 12, 2012

          TFS automation using LinqPad

          On LinqPad

          I love LinqPad. I do a lot of stuff with it like files renaming and crawling web pages to download stuff. Basically, I use it as my scripting platform. Some people uses Powershell or other bash languages and tools, I use LinqPad.

          TFS automation

          We’ve got TFS at work and sometimes I need to do spot checks on multiple projects, I could use the UIs and power tools built-in Visual Studio or the Team Web Access web site but it’s tedious and error prone. I prefer an automated way especially if I need the same information on a regular basis. So I’ve started to look at automating TFS using LinqPad queries. I hope to write a series of posts on this subject, one bit of API at the time and show the power queries I’ve been writing up that help me with my recurring tasks as the TFS guys.

          The Basic

          The basic stuff you need to know is that if you install Team Explorer alone or as part of Visual Studio you will now have access to the TFS automation API assembly directly from the GAC. They all starts with Microsoft.TeamFoundation name prefix. So adding those to your references you could write queries in LinqPad or write a tool in Visual Studio to automate some of your tasks too.

          In the Series

          - Setup your first TFS LinqPad query
          - TFS Queries: Searching in all files of the source control
          - TFS Queries: Recent builds of all team projects
          - TFS Queries: Build agents status and build queue
          - TFS Queries: Generating a changelog from the branch history
          - TFS Queries: Listing all the branches
          - TFS Queries: Searching in all work items

          Thursday, June 30, 2011

          Saturday, May 7, 2011

          SharpSvn

          Rather than using svn.exe through Process.Start SharpSvn library offers a complete API mapping of the command line tool.

          It can be downloaded from the website or fetched via NuGet with: Install-Package SharpSvn.x86 or Install-Package SharpSvn.x64

          The API may seem a bit weird at first but that’s because it wraps a C++ library under the hood.

          As of April 2011 there is no official documentation of the API, so the best source is still trying to make svn.exe do what you want and then translate that in C#.

          So far, the other source of information I currently use is the discussion forums

          One other thing don't really like is the footprint of this library, 64Mo for the NuGet package and 21Mo in bin. Its huge!! I hope that future version will be a bit more slim than now.

          Overall it's still a lot better than using svn.exe directly.

          Monday, December 6, 2010

          Balsamiq Mockups

          This is something that has been around for a while now.  I first tried it years ago but I had not any real usage for it back then.  Last week, I needed something to capture a UI change I was planning to do in my project.  My first though was just draw on a piece of paper, but I have to e-mail this to someone off site.

          What should I do? Scan my drawing, Paint or SketchFlow? No, Balsamiq Mockups!

          On the web site there is an introduction video and a web demo you can use to get a feeling of the tool.  The best part is that I was able to create a simple UI including the changes I was planning do to in less than 5 minutes and downloaded the PNG directly from my web browser!

          It works really well to create low-fi prototype of fat clients, web apps and even iPhone UI.  Additional controls can be downloaded provided by the community.  Finally Balsamiq Mockups can be embedded in other tools like Confluence, JIRA, FogBugz and XWiki.

          If I ever need to do a lot of UI prototyping I think a 79$ for the full version will be really well spend.

          Thursday, November 25, 2010

          Pex4Fun

          Check out this really cool web site. Not only you can write code in your browser you also have IntelliSense. The way it works is you are given a puzzle or a duel to solve (think code breaker C# edition). The goal of the game is to write the same algorithm than the hidden solution. You get hints by running Pex against both the hidden puzzle and your solution.

          Pex is a tool that will try to call a function with any kind of input parameters required to use all the code path of the function. It will highlight thing like passing null might cause a NullReferenceException down the line and you should guard against it. So by trying all those combinations against your code and the hidden puzzle will give hints on the difference of implementation. You can then update your code and try again each time getting closer and closer to the solution.

          You can even create an account and keep track of all the challenges you solved. A section of the site is structured as a course where you learn about C# and cool features like Code Contracts.

          Code Contracts helps us create a more declarative way of expressing pre and post conditions to our code. And because of the declarative way they works, tools can then to provides us with static compile time validation, run time guard code and automated API documentation of the contracts.

          Pex4Fun is really a great way to play around those 2 great tools without having to setup libraries on our machine. I can even show some basic C# stuff to my friends, on the web and even from my smart phone (but then it’s not that fun I must admit!)

          Tuesday, November 9, 2010

          Introduction to LinqPad

          It’s really sad that in the late 2010 most people still don’t know about this incredible little tool.  For me it is a bit like what Reflector used to be in the early days of .Net, a great and FREE productivity tool outside of the Visual Studio IDE and Microsoft tooling.


          LinqPad was created by Joseph Albahari as a companion tool for his book C# 3.0 in a Nutshell.  You don’t have to buy the book to use the tool (actually I haven’t bought the book either! me bad).
          It’s really difficult to do justice to LinqPad in a small blog and I don’t want to write a too long post so I’ll try to expose the most useful features to you today and eventually blog about specific ones in detail in the future.

          Code Snippet execution

          This is the reason I use LinqPad almost every day.  If I want to test a snippet of code I don’t create a dummy VS project, I simply try it in LinqPad.  You can even write a full program if you want and save it as a code snippet.  I use this to create most of my utility tools like when I need to read and display an xml file or generate one I just use LinqToXml.


          LinqPad1

          Learning Tool for Linq and other .Net features

          Went I first found out about LinqPad it was when .Net 3.5 came out and understanding Linq queries was still hard for me.  The tool has a lot of good Linq code sample built in so I could learn and play with the queries.  What makes this interesting is the Dump extension method of the Object type which is really powerful to display the state of any simple or complex data structure.

          LinqPad2

          Integrated LinqToSql

          Another useful thing to do is connecting to a database and have LinqPad setup a LinqToSql wrapper over the schema so you can query it with code rather than SQL.  I cannot say I’ve used this feature a lot but sometime it can be nice if you want to do some processing of data coming from a database.  A Linq to Entity and OData options are also available.  In the future I guess I’ll be using LinqPad to query source like NetFlix and the other OData feeds too.

          LinqPad3

          External Library

          This is something new for me (and I guess to a lot of people given I haven’t seen much info about it on the net), you can load any dlls in LinqPad to use in your queries.  This is an excellent way to create libraries of useful functions and extension methods.  I’ll be using this feature to query assemblies using Mono.Cecil with some extra functions of my own.  I’ll share with you the result of my experiments in a future series of posts.


          Go download LinqPad!  You should definitely give this great tool a try.